I'll go through our gear in some detail here, and explain why we made the choices we did. But, I won't try to convince you that my gear is "correct" or "the best." I will say that Liz and I were both really happy with all of our gear, and there are very few changes we would make if we were to hike the trail again.
For context, we consider ourselves "prettylight," meaning we aim for the lightest possible options, and stay minimalist where we can, but don't begrudge ourselves some luxuries that tend to push our base pack weights somewhat over the traditional 10 lb. "ultralight" limit.
For context, we consider ourselves "prettylight," meaning we aim for the lightest possible options, and stay minimalist where we can, but don't begrudge ourselves some luxuries that tend to push our base pack weights somewhat over the traditional 10 lb. "ultralight" limit.
This ended up being a really long post, so I split it up into 2 parts. I'll go over non-clothing gear here, and do a separate review of our clothes.
First, a link to all of our gear: Google spreadsheet
My pack: Osprey Exos 58L, 40 oz

Many people with base weights in our range (< 12 lbs) consider switching to frameless packs to save even more weight. Like I said, gear choices are personal... and I personally can't recommend frameless packs for a thru hike. In my opinion, the extra weight the frame adds is more than compensated for by the extra comfort the frame provides. Make your own decision, but remember that, at some point, you will have to load your pack up with 8+ days of food.

Liz has an Osprey Aura 50L (52 oz). She actually started the trip with an Aura 65L, but due to an airline mishap, she ended up missing a cross brace in the frame, and had to trade it in. The Aura 65 isn't sold in NZ, so she downgraded to a 50L. For us, 58L + 50L ended up being the perfect size - normally way too much space, but just enough space for food for our longest stretch (9.5 days). Liz loved her old Aura, but is slightly less thrilled with the new one. It seems that in the latest generation of Auras, a lot of effort was put into increasing comfort and adjustability, and the pack seems a bit bulkier now. It's not a bad pack, but she prefers the older style.
For rain, we carry pack covers. We don't use pack liners, but everything important inside our packs is waterproof on its own (either it can get wet, or it's inside a dry bag or a ziplock). If it rains long enough and hard enough, your pack will get wet, even under a pack cover, so make sure you waterproof critical things like clothes and sleeping bags somehow. Despite this, we find the pack covers to be worth carrying because they usually keep our packs from being completely soaked unless the weather is horrible.
Hydration: Platypus 3L Hoser

We each carried a 3L hoser bag for water. A hoser is a bag with a drinking tube that extends out of your pack and gets attached to your pack shoulder strap, so you can drink at any time. 3 liters each was more than enough almost everywhere, except for the few times we dry camped on the north island.
The hosers are nice because they let you drink easily at any time. This really helps you stay hydrated, which is more important than most people realize. Digging a bottle out of the side of your pack, unscrewing a cap, and wrestling it back in is enough of a pain that it would keep me from drinking as much as I should.
However, hosers are a bit of a pain to refill when your pack is full. This meant that, most days, we started out carrying a full days worth of water, to avoid having to dig the bags out of our packs to refill. And water is heavy.
I would love a water system that gave me a tube, but also was super easy to refill. In most places on the TA, water is abundant. If you refill/drink at every opportunity you could probably get away without carrying any water at all on many days, and it would be rare that you'd need more than a liter at a time. If you know of a water system like this, let me know!
Tent: TarpTent Squall 2, 34 oz

The Squall 2 (along with all other TarpTents) is a single walled tent, meaning there is not a separate rain fly, and the tent itself is made out of waterproof-breathable material (waterproof from the outside, somewhat breathable from the inside). This saves a lot of weight - no double walled tent of similar size could ever be as light as this.
Single walled tents do have one downside though - condensation tends to build up on the inside of the tent when you camp in humid conditions. This means you might get a bit of a shower if you sit up in the morning and bump the top or side. For us, this bit of inconvenience and discomfort is more than worth the weight savings.
 Another consideration with the Squall is the pitching. It uses one or two hiking poles as support, so if you don't hike with poles, you'll have to order tent poles from TarpTent, and the weight will increase a bit. It also isn't freestanding. We have successfully pitched it on hard surfaces with the help of logs or rocks though.
With regards to rain, the direction in which the Squall is pitched is very important. In short, you want the foot into the wind. If you mess this up, or the wind changes significantly, you are much more likely to get water in the tent if it rains. We had one miserable night with rain and strong wind blowing across the tent, and ended up with some decent puddles on the floor the next morning. However, if you pitch it correctly and the wind cooperates a little bit, you'll stay very dry.
As for wind resistance, it's surprisingly stable as long as you have firm ground in which to put the stakes. We had wind one night that was strong enough to bend the rear tent pole a bit, but the tent itself was fine.
As for lighter alternatives to a single walled tent, we're not willing to sacrifice enough comfort to drop down to either bivy bags or tents without bug netting. If you think you can live without bug netting, you have not met the NZ sandfly.
Single walled tents do have one downside though - condensation tends to build up on the inside of the tent when you camp in humid conditions. This means you might get a bit of a shower if you sit up in the morning and bump the top or side. For us, this bit of inconvenience and discomfort is more than worth the weight savings.
With regards to rain, the direction in which the Squall is pitched is very important. In short, you want the foot into the wind. If you mess this up, or the wind changes significantly, you are much more likely to get water in the tent if it rains. We had one miserable night with rain and strong wind blowing across the tent, and ended up with some decent puddles on the floor the next morning. However, if you pitch it correctly and the wind cooperates a little bit, you'll stay very dry.
As for wind resistance, it's surprisingly stable as long as you have firm ground in which to put the stakes. We had wind one night that was strong enough to bend the rear tent pole a bit, but the tent itself was fine.
As for lighter alternatives to a single walled tent, we're not willing to sacrifice enough comfort to drop down to either bivy bags or tents without bug netting. If you think you can live without bug netting, you have not met the NZ sandfly.
Aside from that, I have one very small gripe with the tent after using it for years. It is made out of silnylon, which tends to sag a bit after the tent is set up. This means you need to tighten all the stakes at some point, which is a bit of a pain. If I had infinite money, I would buy a tent made from cuben fiber, which does not have the same sagging issues. Unfortunately, cuben fiber is probably 5x more expensive than silnylon. If you have infinite money, check out ZPacks, they make some well reviewed cuben tents.
Sleeping bag: ZPacks 20° twin quilt, 29 oz


This was one of the few pieces of gear we newly acquired for the TA. It is a double wide "quilt," meaning it doesn't wrap all the way around you like a normal sleeping bag. The footbox is enclosed, but the upper 2/3 of the bag act more like a blanket. When it is cold, you can tuck the edge underneath yourself to keep the warm air in. Quilts are all the rage with the ultralight kiddies these days, and for good reason. Down does not insulate when it is compressed, which means that, with a normal sleeping bag, the down that is squashed under your body does almost nothing to keep you warm. Quilts just leave that part out, making them much lighter.
The weight savings was incredible - we already had quite light sleeping bags, but, at 29 oz, this weighed the same as just one of them. The quilt itself is great - well constructed and warm. It did take a little getting used to, as you can't just roll all over the place without letting cold air in, but I found the transition to be easy. In fact, one of my favorite things about the quilt design is that it is easier to vent a little bit when it is too warm - just untuck the side. Sharing a twin quilt also kept us warmer on cold nights.
I can't give the twin version an unequivocal thumbs up for the TA though. Many of the huts have bunk configurations that make it hard or impossible to set up 2 mattresses next to each other. In many, we were able to put 2 mattresses on the floor next to each other, but floor space in the huts is limited, and if there are other people staying in the hut, it often just won't work. There were a few nights where we ended up sleeping next to each other on a single mattress. We are fairly small people, and it was still really cramped and uncomfortable. We managed to deal with this, but it was a fairly frequent annoyance. If you're considering a twin quilt or bag for the TA, make sure you weigh this in your decision. If you will only be staying in a tent though, the ZPacks twin quilt is the way to go!
 |
| Pillow mode |
 |
| Dry bag mode |
If you know me, you're probably reading this thinking "There's no way Joe brought a pillow with him. The idiot cuts the handle off of his toothbrush, for Pete's sake."
But, you forget that, even more than I love cutting ounces, I love multi-taskers. ZPacks has a brilliant piece of gear - the pillow dry bag. It's a reversible dry bag, with felt sewn onto one of the inner sides. During the day, it keeps all your clothes dry, and at night, you stuff it with your jacket and have the most comfortable backcountry pillow I've used. For such a small thing, this was one of our favorite pieces of gear.
Sleeping pads: NeoAir XLite 3/4 length, 9.5 oz
 |
| We have the older, square model. The newer NeoAirs are tapered |
NeoAirs are so comfortable. Leaps and bounds better than a self-inflating foam pad. We opted for the 3/4 length versions, to save weight, and put our empty packs under our lower legs at night.
Unfortunately, they are a bit fragile. Some people avoid them over worries about holes and leaks. This is a valid concern. We are very careful with ours - they only ever come out of their stuff sacks inside the tent. Even so, I got a micro-puncture in mine on a past trip - just small enough that it would end up about half inflated after a full night's sleep. I was unable to locate the hole (even in the bathtub), and actually ended up reluctantly ordering a new one just before we left for the TA. However, both of ours made it through the entire TA with no problems.
Cooking: Caldera cone alcohol stove, 5.5 oz

We use an alcohol stove for cooking. In NZ, the easiest fuel to find is called methylated spirits. It's typically used for cleaning, and can be found in any grocery store.
Overall, we prefer our alcohol stove over a gas canister stove for a couple of reasons. First, the fuel is easy to get anywhere. In NZ, gas canisters are surprisingly common, and you shouldn't worry about finding them if you already have a canister stove. However, in general, we like not having to worry about whether or not our destinations will sell canisters. Alcohol stove fuel can be found anywhere, in just about any country.
Second, you can tell exactly how much fuel you have left. This is more of an issue for shorter trips - for a weekend, I can bring exactly 2 days worth of fuel. On the TA, though, I ended up carrying 2 weeks of fuel at times.
The main downside for alcohol stoves is that they have two temperatures: on and off. No simmering. Certainly no sautéing. Just boiling. You measure out enough fuel for the amount of water you want to boil, light the stove, and wait until the fuel is exhausted. There's no stopping early, or turning down the temperature.
This is one piece of gear I might reconsider if I were to do the TA again. Over a long trip, a JetBoil (or equivalent) + canister is probably more weight efficient than an alcohol stove + alcohol. I haven't run the numbers to figure this out for sure though. Of course, a super efficient canister stove like the JetBoil also has the same main drawback as an alcohol stove - it basically only boils water.
Eating: Titanium pot, titanium spork x 2, 32 oz plastic container, 10.6 oz total

We are minimalist when it comes to dishes. We share our meals out of our pot, and mix up drinks in our large plastic container. That's it. It's surprisingly rare that we wish we had more - usually only when we want to heat up water for a drink while we're eating out of the pot.
Knife: Gerber LST, .6 oz

Water purification: Steripen Freedom, 2.6 oz

We love our Steripen. It's a UV wand, and when you stir your water with it, it mutates the DNA of any bacteria in the water, preventing them from reproducing inside you. Science! We've never had any problems with it, and have never gotten sick when using it.
On the TA, you will need some sort of water purification, although there will be long stretches where you can get by without it. Most huts have good rain barrels, and we drank from most of them without sterilizing (some barrels weren't really sealed up, and we sterilized from those... especially after reading a comment in a hut book about a dead bird being found in the rain barrel). Also, most streams in the mountains on the south island are probably safe. Any water near farmland (most of the north island, parts of the south island) definitely needs treatment though.
We went with the Freedom because it is the lightest Steripen model, but it also happens to be USB rechargeable. We had a charging epiphany on this trip, and tried to convert as many things as possible to USB charging. We ended up managing to only carry a single charger for all of our electronic devices. Hooray standardization!
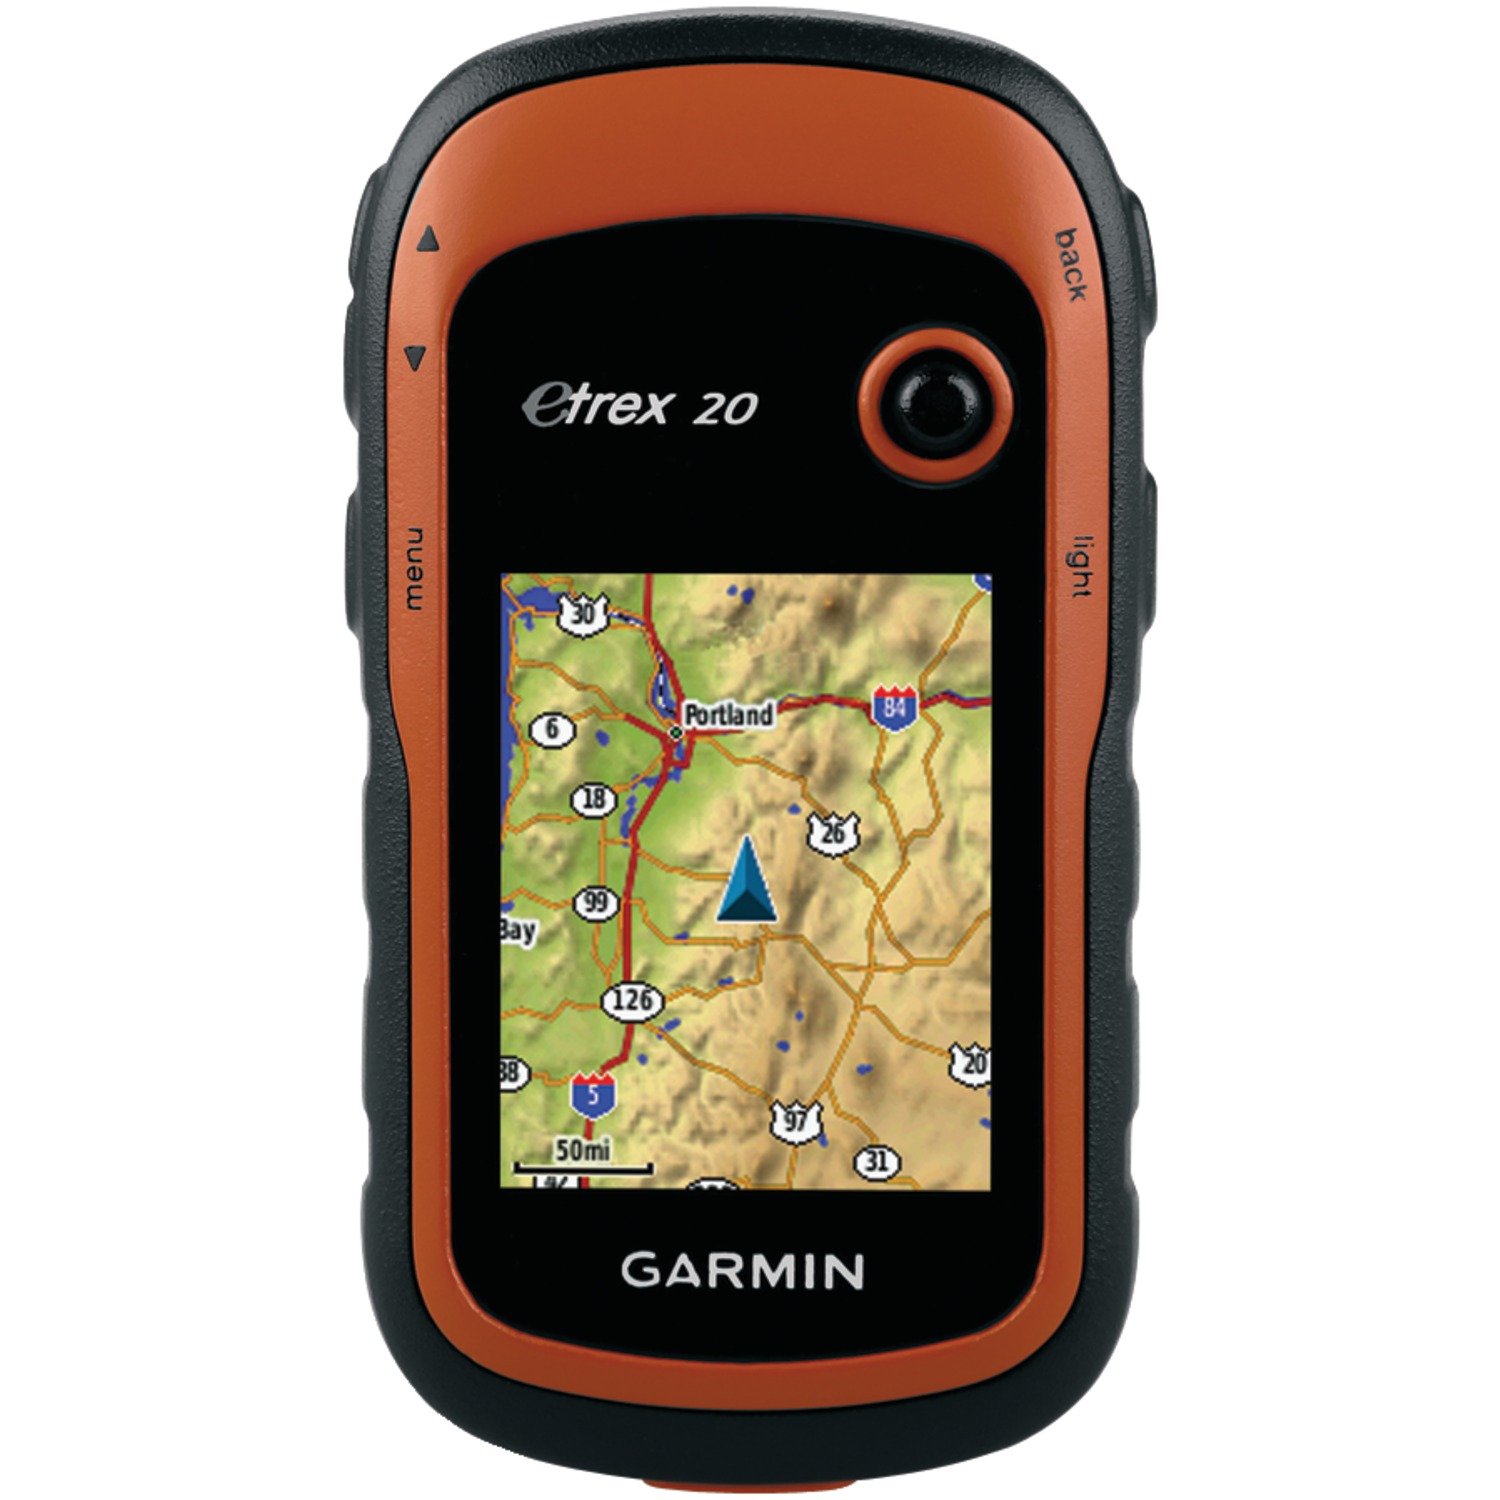
Navigation: paper maps, paper trail notes, Garmin eTrex 20, Galaxy SIII phone
Our main navigational tools were paper maps and paper trail notes. Gear is a personal choice, but in my opinion, non-electronic navigational tools are not optional. Bring paper maps, a compass, and know how to use them.
For the TA, I would also recommend a GPS. It was rare that I needed it for actual navigation - most of the time it was used as a luxury to tell us how close we were to a hut or campsite when we were tired and had no landmarks. However, there were a handful of times where the trail was not marked, or confusingly marked, and having the GPS saved us potentially a lot of wasted time in finding it. Also, only 5 days from the end of the trip, we found ourselves on a poled (no ground trail) section, in extremely low visibility. While the map and compass told us the general direction we were supposed to go in, the GPS was essential to keep us from wandering too far from the actual trail.
The eTrex 20 was great, and I ran into a number of other people using the same exact model. I'd recommend it. You can also probably get away with just using a smartphone's GPS, although battery life and water resistance (if you need your GPS, chances are the weather is bad) could be an issue. If you do go the phone route, check out OpenStreetMaps. There are apps for both iPhone and Android, but make sure you find an app for your platform that will allow 100% offline use (for Android: OsmAnd), as you almost certainly won't have a signal when you want to use it.
Camera: Sony WX150, 7 oz (with case)

We knew we needed a new camera for this trip. Our old camera was about 10 years old, and the picture quality had degraded noticeably. When shopping for a camera, we were mainly looking for something small, light, and USB rechargeable. The Sony WX150 was one of the only cameras that fit this description, and it had decent reviews, so we gave it a shot.
It's not bad. It took some great pictures, which is the most important thing.
However, the construction of the camera is a bit cheap, and it just barely survived the trip. There is a multi-function click wheel on the back of the camera that is used for most interaction, and at some point it got out of whack, and became almost unusable. At times, it would scroll through picture modes without being touched, and at times it wouldn't respond at all. Sometimes the lens wouldn't retract when the camera was turned off. It also somehow got crap on the inside of the lens, which put a black dot on every zoomed in picture we took for the last few weeks of the trip. Full disclosure - this camera spent almost every day in my pocket, rather than in a case. So I can't really fault the camera, but I was still a little disappointed.
We also tried to find a camera with a physical viewfinder, so that we could turn off the screen to extend the battery life, but this doesn't seem to exist anymore. Luckily, battery life in digital cameras seems to have advanced quite a bit since our last camera, and it was almost never an issue, even on our longest stretches between civilization.
Cell phone: Galaxy SIII, 5 oz

We brought one cell phone with us, and got a NZ SIM card for it. We originally tried Telecom, but had issues with that in Northland, and switched to Vodafone, which we were happy with. The cell phone was off 99% of the time we were on the trail, but in towns it was indispensable. We were able to use it for email, research, weather, local phone calls... I guess I don't need to list all the amazing things a modern smartphone can do. But they seem so much more important when you don't otherwise have easy access to a computer.
PLB: SPOT, 4.25 oz

First of all, if you're doing the TA, carry a personal locator beacon (PLB) of some sort. No ifs, ands, or buts. If you are out in the backcountry, you should have one, both for your own safety and for your potential rescuers' safety (the less searching they have to do for you, the less of a chance they will be injured).
We carried a SPOT as our PLB. The SPOT was great when it worked - we checked in every day, our families were able to see where we were, and we have this great map of most of our camp sites.
However, our faith in the SPOT was weakened a bit on this trip. At one point, the SPOT notified us that its batteries needed to be replaced. We carried spares, so we replaced them. When we got to our next town, we discovered that our check-ins hadn't been getting through for 4 days before the battery notification showed up. Because our families were expecting to see check-ins from us every day, or at least every couple of days, they were understandably freaked out. Luckily we weren't actually in trouble, but it made me a little worried about what would happen if we had needed the "rescue me" button on the SPOT during those four days.
Also, the SPOT has a major disadvantage compared to a proper PLB - distress signals are sent to an intermediary (GEOS International Emergency Response Coordination Center headquartered near Houston, Texas) which then forwards on the distress call to the local search and rescue. While I'm sure that the coordination center has quite a bit of experience in transitioning distress calls, it's another link in a chain, and another place where something could go wrong when your life is on the line. You can read about PLBs vs. "satellite messengers" here: http://www.rei.com/learn/expert-advice/personal-locator-beacons.html, and make your own decision about which one is best.
Charging: Innergie PocketCell Duo, 5 oz


We carried a battery pack, mostly because I thought we'd need it to recharge the Steripen on longer stretches. I don't think we ever ended up needing it for that, so this was a bit of unnecessary, but often convenient, weight. It was nice to have in towns and on longer bus rides, when we wanted to charge and use the phone at the same time. The best part about this battery pack was the cable that came with it - short, light, and fits mini USB, micro USB, and our iPod. The Innergie PocketCells had just about the highest capacity to weight ratio I could find.
Light: Photon LED, .35 oz

These suckers are pretty bright, and weigh next to nothing. They aren't quite bright or wide enough for any real night hiking though. We generally avoid walking after dark if at all possible, so this isn't an issue for us. If you like to push on after the sun goes down, I'd recommend a real headlamp for another couple of ounces.
Whew. This is probably the most comprehensive gear write up I've ever done. Hopefully this is not too much info splatted in one place. If you have any questions, please don't hesitate to ask - I love to talk gear!
About your water system complaint: I just got a new osprey pack and it has an easy to access water bladder pouch that is the most convenient thing in the world
ReplyDeleteHey Joe,
ReplyDeleteI'm heading out tomorrow for New Zealand and I am playing around with my eTrex20 and I am kind of confused! Can I download the maps from the Te Araroa website onto it? Any tips for using it? frannynewport@gmail.com
Hey Joe, Not sure if you're still checking this, but I'm wondering what pot you guys used? I've only done weekend trips so I haven't bothered to cook while backpacking before. Thanks!
ReplyDeleteHey Douglas - we have the Snow Peak 1400. It's pretty large, because we are almost always cooking for 2. We're reasonably happy with it, although if you try to put liquid in the lid, the handle tends to give out unless you hold it just-so. I think most titanium pots are pretty equivalent, and you may be able to find a better deal on a different brand at this point.
ReplyDeletehttp://snowpeak.com/collections/cookware/products/trek-1400-titanium-cookset?variant=671149753
Wow thanks for the quick reply! You guys didn't have any trouble cooking for two with that setup? I've read some people say that alcohol stoves are best for solo trips.
DeleteHey Joe !
ReplyDeleteI am 18 years old and from Germany. Two friends and me will do the same hike this winter/summer. I love your block, it is so good and exciting, i can't stop reading.
But, I have a question: I love taking pictures. I own a camera(Nikon D3200, which has a weigth a bit more as 1 kg. Besides it is very big (its a normal SLR. Do you think its too big and massive?
Hi! It's totally up to you! If you love taking pictures, you should carry the camera. If that's an integral part of the experience for you, then it's worth the weight. You may need to figure out how to pack it safely in your pack, to avoid it getting damaged.
DeleteBut tramping should be all about how you want to experience your journey, so there's no right or wrong answers about what extras you should carry!
Hi Joe,
ReplyDeleteI'm planning to hike the Te Araroa this fall. I usually use a hammock on my backpacking trips. Do you think this would be practical in New Zealand or should I invest in a good tent?
Thanks,
Karen
Thanks for sharing. I love the Zpacks pillow dry bag, what a great idea.
ReplyDeleteEasy "water hack" burns 2 lbs OVERNIGHT
ReplyDeleteOver 160 thousand men and women are hacking their diet with a simple and SECRET "water hack" to lose 1-2 lbs every night as they sleep.
It's very simple and it works on everybody.
This is how to do it yourself:
1) Take a clear glass and fill it half glass
2) Proceed to follow this amazing hack
and be 1-2 lbs lighter in the morning!
شركة تسليك مجاري
ReplyDeleteشركات تنظيف
كشف تسربات المياه